Embarking on the journey of how to manage fish breeding tanks is a fascinating endeavor, blending science, patience, and a deep appreciation for aquatic life. This comprehensive guide will delve into every aspect of creating and maintaining a thriving environment for your fish to breed successfully. From setting up the ideal tank to nurturing the delicate fry, we’ll explore the essential elements that contribute to a flourishing breeding program.
We’ll cover tank setup, water parameter control, selecting and conditioning breeding stock, breeding methods, egg and fry care, feeding and nutrition, disease prevention, tank maintenance, troubleshooting, and documentation. This detailed exploration aims to equip you with the knowledge and tools necessary to achieve successful breeding outcomes and enjoy the rewarding experience of raising healthy, vibrant fish in your home aquarium.
Tank Setup and Preparation

Setting up a breeding tank is a crucial step in ensuring the successful propagation of your fish. Proper preparation of the tank environment significantly impacts the health of the fish, the quality of the water, and the overall chances of breeding success. This section will guide you through the essential aspects of tank setup and preparation, providing detailed insights into tank size, substrate selection, cycling, and equipment placement.
Tank Size for Breeding Different Species
The appropriate tank size is paramount for the well-being of breeding fish and their offspring. The size of the tank directly influences the fish’s behavior, the availability of space, and the ease of maintaining optimal water conditions. Different species have varying needs, and choosing the correct tank size is essential for their reproductive success.
- Small Species (e.g., Betta, Guppies, Endlers): These species often thrive in smaller tanks. A 10-gallon tank can be suitable for breeding a pair or a small group. However, larger tanks (20 gallons or more) are often preferred for larger groups, offering more space and stability.
- Medium-Sized Species (e.g., Angelfish, Discus): Medium-sized species require more space. A 20-gallon long tank is often the minimum for a pair of angelfish, providing adequate space for spawning and initial fry rearing. Discus, being larger and more sensitive, typically require a minimum of a 55-gallon tank for a breeding pair, allowing for optimal water parameters and ample swimming room.
- Large Species (e.g., Oscars, Flowerhorns): Larger species necessitate substantial tank sizes. Breeding these fish often requires tanks of 75 gallons or larger, sometimes even exceeding 100 gallons, to accommodate the size of the adults and the potential for a large number of fry.
Substrate Selection and Its Impact
The substrate, the material at the bottom of the tank, plays a significant role in water quality, fish health, and the breeding process. Choosing the right substrate can greatly enhance breeding success.
- Bare Bottom Tanks: These tanks lack substrate, and are often preferred for breeding because they simplify cleaning and make it easier to monitor the fish and remove waste. They also reduce the risk of substrate-borne diseases. This is particularly helpful for egg-laying species where the eggs can be easily collected.
- Gravel: Gravel is a common substrate choice. It can harbor beneficial bacteria that help with the nitrogen cycle. However, gravel can trap debris, requiring regular vacuuming to maintain water quality. Select inert gravel to avoid affecting water chemistry.
- Sand: Sand is a popular choice, particularly for species that sift through the substrate. It’s less likely to trap debris compared to gravel. However, it can compact over time, potentially creating anaerobic pockets that can be harmful.
- Substrate Considerations:
- Inertness: The substrate should be inert, meaning it doesn’t alter the water’s pH or hardness.
- Particle Size: The particle size should be appropriate for the fish species. Very small particles can be ingested, while large particles may trap food and waste.
- Color: The color can affect the fish’s behavior and appearance. Dark substrates can make fish appear more colorful, while lighter substrates can provide a better view of the fish.
Cycling a New Tank
Cycling a new tank is a fundamental process that establishes a healthy biological environment before introducing fish. This process cultivates beneficial bacteria that break down harmful waste products, such as ammonia and nitrite, which are toxic to fish.
- The Nitrogen Cycle: The nitrogen cycle is the core process in a cycled tank. It involves the conversion of ammonia (from fish waste and uneaten food) to nitrite, and then to nitrate. Nitrate is less toxic and can be removed through water changes.
Ammonia (NH3/NH4+) -> Nitrite (NO2-) -> Nitrate (NO3-)
- Cycling Methods:
- Fishless Cycling: This method uses ammonia sources (e.g., pure ammonia solution or fish food) to start the cycle without introducing fish. The goal is to build up a colony of beneficial bacteria before adding fish.
- Fish-In Cycling: This method involves introducing a small number of hardy fish and monitoring water parameters closely. It’s less ideal as it exposes fish to potentially harmful ammonia and nitrite levels.
- Monitoring Water Parameters: Regularly testing the water for ammonia, nitrite, and nitrate levels is crucial during the cycling process. Use a liquid test kit for accurate readings.
- Cycling Duration: The cycling process can take several weeks, typically 4-8 weeks, to complete. The tank is considered cycled when ammonia and nitrite levels consistently read zero, and nitrate levels are detectable.
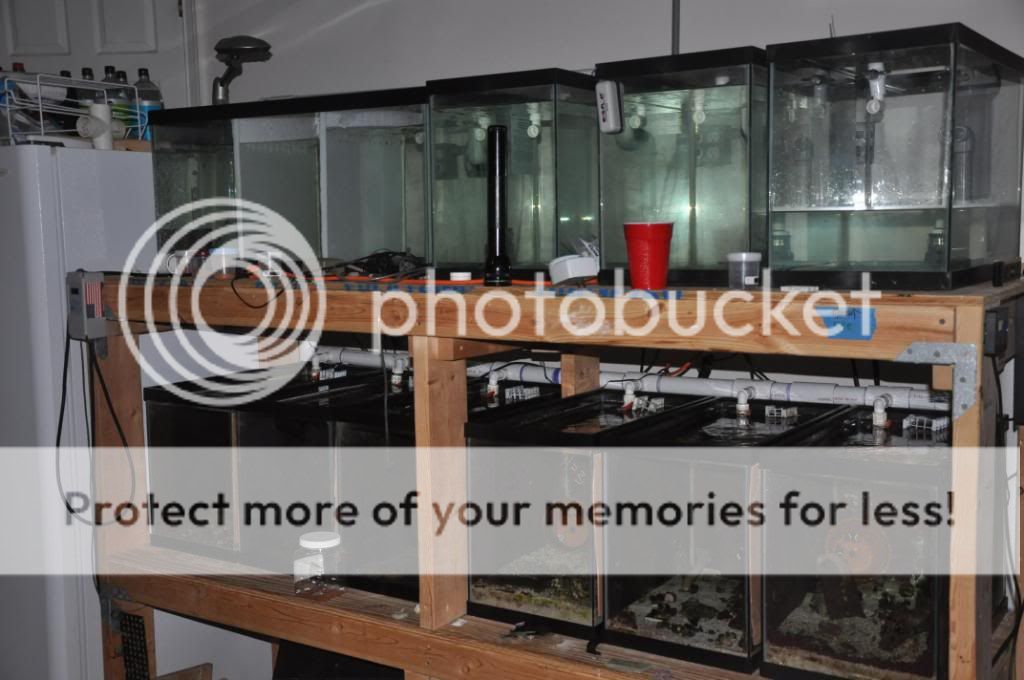
Placement of Essential Equipment
Proper placement of essential equipment is critical for the efficient functioning of the breeding tank and the health of the fish. Strategic placement ensures optimal water circulation, temperature regulation, and filtration.
Consider the following arrangement for a typical breeding tank:
- Heater:
- Placement: Position the heater near the filter intake, away from direct water flow, to ensure even heat distribution. Place it at an angle or near the bottom of the tank.
- Description: The heater is a glass or plastic tube containing a heating element that maintains the desired water temperature. The thermostat is usually built into the heater.
- Filter:
- Placement: Place the filter in a location that allows for optimal water circulation. Ensure the filter intake is not blocked by decorations or plants.
- Description: The filter removes waste and debris from the water. There are different types of filters, including:
- Internal Filters: Submerged inside the tank, often attached to the tank wall.
- External Filters (Canister Filters): Placed outside the tank, offering high filtration capacity.
- Sponge Filters: Simple filters that provide mechanical and biological filtration.
- Air Pump (if used):
- Placement: Place the air pump outside the tank, above the water level, to prevent water from siphoning back into the pump.
- Description: The air pump provides oxygen to the water, which is essential for the fish’s respiration and the beneficial bacteria in the filter. Connect the air pump to an air stone or a bubbler inside the tank.
- Other Equipment:
- Thermometer: Place the thermometer in a visible location to monitor the water temperature.
- Lighting: Position the lighting fixture above the tank, providing appropriate light levels for the fish and any plants.
Water Parameters and Monitoring
Maintaining optimal water parameters is crucial for successful fish breeding. These parameters directly influence fish health, egg development, and fry survival. Regular monitoring and adjustments are essential to provide a stable and suitable environment for breeding fish. The following sections detail the critical aspects of water parameter management in breeding tanks.
Optimal Water Temperature for Breeding
Water temperature significantly impacts fish breeding, influencing spawning behavior, egg incubation, and fry development. Different fish species have specific temperature requirements.
- Temperature Measurement: Use a reliable thermometer to accurately measure water temperature. Digital thermometers are generally preferred for their ease of use and accuracy. Place the thermometer in a location where it is easily visible and away from direct heat sources or aeration.
- Species-Specific Requirements: Research the ideal temperature range for the specific fish species you intend to breed. For example, Discus fish typically breed at temperatures between 82-86°F (28-30°C), while goldfish thrive at cooler temperatures, often spawning in the mid-60s°F (around 18-20°C).
- Temperature Adjustment Methods:
- Heaters: Submersible aquarium heaters are commonly used to increase water temperature. Choose a heater with appropriate wattage for the tank size. A thermostat regulates the heater to maintain the desired temperature.
- Chillers: Aquarium chillers are used to lower water temperature, particularly useful in warmer climates or for species requiring cooler temperatures.
- Monitoring and Adjustment: Monitor the temperature regularly, ideally several times a day, especially during the breeding process. Make small, gradual adjustments to avoid stressing the fish. Sudden temperature changes can be detrimental to egg development and fry survival.
- Example: Consider the breeding of Betta fish. Betta breeders often raise the water temperature to around 80°F (27°C) to stimulate breeding behavior. Once the eggs are laid, the temperature is maintained to ensure proper incubation.
Testing and Adjusting pH Levels
pH level, which measures the acidity or alkalinity of water, is another critical water parameter. Maintaining the correct pH is vital for fish health, egg fertilization, and fry development.
- pH Testing: Use a reliable pH test kit to regularly measure the pH of the breeding tank water. Liquid test kits are generally more accurate than test strips. Test the water at least once a week, or more frequently during the breeding process.
- Species-Specific pH Requirements: Different fish species have different pH preferences. Research the ideal pH range for your target species. For example:
- Many South American fish, like Discus, prefer slightly acidic water (pH 6.0-7.0).
- African cichlids, on the other hand, often thrive in alkaline water (pH 7.5-8.5).
- pH Adjustment Methods:
- Increasing pH: Use commercial pH buffers or add crushed coral or aragonite substrate to the tank to increase pH. Aeration can also help to raise pH by removing dissolved carbon dioxide.
- Decreasing pH: Use commercial pH down solutions, or add peat moss or driftwood to the tank. The addition of reverse osmosis (RO) or deionized (DI) water can also lower pH.
- Gradual Adjustments: Make pH adjustments gradually to avoid stressing the fish. Sudden changes in pH can be as harmful as drastic temperature fluctuations.
- Example: If breeding Cardinal Tetras, which prefer slightly acidic water, the pH might be adjusted to 6.5 using a pH down solution or by adding peat moss to the filtration system.
Importance of Regular Water Changes
Regular water changes are essential for maintaining water quality and removing harmful substances that can accumulate in breeding tanks.
- Benefits of Water Changes:
- Dilution of Harmful Substances: Water changes dilute ammonia, nitrites, and nitrates, which are toxic to fish.
- Removal of Organic Waste: Water changes remove uneaten food, fish waste, and other organic debris.
- Replenishment of Minerals: Water changes replenish essential minerals and trace elements that are depleted over time.
- Water Change Schedule: The frequency and volume of water changes depend on factors such as tank size, stocking density, filtration, and the specific fish species.
- Small Tanks (e.g., 10-20 gallons): Perform 25-50% water changes once or twice a week.
- Larger Tanks: Perform 10-25% water changes once or twice a week.
- Breeding Tanks: During the breeding process, more frequent water changes (e.g., 25% daily or every other day) may be necessary to maintain optimal water quality.
- Water Preparation:
- Dechlorination: Always dechlorinate tap water before adding it to the tank to remove chlorine and chloramine, which are toxic to fish. Use a water conditioner designed for this purpose.
- Temperature Matching: Ensure the new water is the same temperature as the tank water to avoid shocking the fish.
- Water Quality: Use clean, aged, or treated water for water changes.
- Example: A breeder of Corydoras catfish might perform 25% water changes every other day during the spawning period to maintain excellent water quality for the eggs and fry.
The Role of Filtration in Breeding Success
Filtration is critical for maintaining water quality and providing a healthy environment for breeding fish. Different types of filtration play distinct roles.
- Mechanical Filtration: Removes solid particles, such as uneaten food and fish waste, from the water.
- Types: Sponge filters, filter floss, and canister filters with mechanical filtration media.
- Importance: Prevents cloudiness and reduces the load on biological filtration.
- Biological Filtration: Converts harmful ammonia and nitrites into less toxic nitrates through the action of beneficial bacteria.
- Types: Bio-media, such as ceramic rings, bio-balls, or sponge filters, provide a surface for the bacteria to colonize.
- Importance: Essential for maintaining a stable nitrogen cycle and preventing toxic buildup.
- Chemical Filtration: Removes dissolved pollutants, such as medications, tannins, and odors, from the water.
- Types: Activated carbon, resins, and other chemical filtration media.
- Importance: Improves water clarity and removes unwanted chemicals.
- Filter Maintenance: Regularly clean or replace filter media according to the manufacturer’s instructions. Avoid cleaning all filter media at once, as this can disrupt the beneficial bacteria. Rinse mechanical filter media in tank water to preserve beneficial bacteria.
- Filtration for Breeding:
- Choose a filtration system appropriate for the tank size and stocking density.
- Ensure the filter provides adequate mechanical, biological, and chemical filtration.
- Consider using a sponge filter in fry tanks to prevent fry from being sucked into the filter.
- Example: A breeder of angelfish might use a combination of a sponge filter (for mechanical and biological filtration) and activated carbon (for chemical filtration) in the breeding tank to maintain optimal water quality for the eggs and fry. The sponge filter also prevents small fry from being drawn into the filtration system.
Selecting and Conditioning Breeding Stock
Selecting and preparing the right fish is crucial for successful breeding. This involves choosing healthy, mature individuals and providing them with optimal conditions to stimulate spawning. Careful attention to detail at this stage significantly increases the chances of viable offspring and a thriving breeding program.
Selecting Healthy and Mature Fish
The selection of breeding stock requires careful observation and evaluation. The goal is to choose fish that are in prime condition, free from disease, and of appropriate age and maturity.
- Physical Examination: Observe the fish for any signs of disease or injury. This includes checking for fin rot, parasites, abnormal growths, or any unusual behavior. The fish should be active, alert, and exhibit normal swimming patterns. Look for clear eyes, vibrant coloration (if applicable to the species), and a healthy body shape.
- Age and Maturity: The age at which fish reach sexual maturity varies greatly depending on the species. Research the specific requirements of the fish you intend to breed. In general, fish are not ready to breed until they are sexually mature. This can often be determined by observing physical characteristics such as size, coloration, and behavior.
- Size and Condition: Select fish that are of appropriate size for their species. Overly large or small individuals may not breed successfully. The fish should also be in good physical condition, with a healthy body weight and no signs of emaciation.
- Behavioral Assessment: Observe the fish’s behavior within the tank. They should exhibit normal social interactions and not display signs of aggression or stress. Avoid selecting fish that are constantly hiding or exhibiting erratic swimming patterns.
- Genetic Considerations: Whenever possible, avoid breeding closely related individuals to prevent inbreeding. This can lead to genetic defects and reduced viability in offspring. If possible, obtain breeding stock from different sources to increase genetic diversity.
Conditioning Breeding Fish with Different Dietary Regimes
Conditioning breeding fish involves providing a diet that is rich in nutrients and supports the development of eggs and sperm. The specific dietary needs will vary depending on the species.
- Protein: Protein is essential for egg and sperm production. Provide a diet rich in high-quality protein sources.
- Fats: Fats are important for energy and the development of eggs. Include sources of essential fatty acids.
- Vitamins and Minerals: Vitamins and minerals are crucial for overall health and reproductive success. Ensure the diet is supplemented with appropriate vitamins and minerals.
- Live Foods: Live foods, such as brine shrimp, daphnia, and bloodworms, can be highly beneficial for conditioning breeding fish. They are often rich in nutrients and stimulate spawning behavior.
- Dietary Regimes Examples:
- Carnivorous Fish: For carnivorous fish, a diet primarily consisting of high-protein foods, such as live or frozen foods (bloodworms, brine shrimp, etc.), and high-quality flake or pellet food with a high protein content, is essential. Supplementing with vitamins and minerals is also beneficial.
- Herbivorous Fish: Herbivorous fish require a diet rich in plant matter. This can include spirulina flakes, blanched vegetables (spinach, zucchini), and algae wafers. Providing occasional live foods, such as daphnia, can also be beneficial.
- Omnivorous Fish: Omnivorous fish benefit from a balanced diet that includes both plant and animal matter. A combination of flake food, live or frozen foods, and vegetables is generally suitable.
Signs of Readiness for Spawning
Identifying the signs of readiness for spawning is critical to successfully breed fish. These signs vary between species, but some common indicators can be observed.
- Physical Changes:
- Swollen Abdomen: In females, the abdomen often becomes noticeably swollen as eggs develop.
- Coloration Changes: Many species exhibit changes in coloration during the breeding season. Males may develop brighter colors or patterns to attract females.
- Physical Dimorphism: Some species display physical differences between males and females, such as larger fins in males or the development of a breeding tube in females.
- Behavioral Changes:
- Courtship Behavior: Males often engage in courtship displays, such as chasing females, displaying their fins, or constructing nests.
- Pairing: Breeding pairs may isolate themselves from other fish.
- Nest Building: Some species build nests. The fish will choose a suitable location to build the nest.
- Increased Activity: The fish may become more active and swim around the tank more frequently.
- Examples of Specific Species:
- Betta splendens (Siamese Fighting Fish): Males build bubble nests at the water surface. Females develop a swollen abdomen and vertical stripes.
- Guppies (Poecilia reticulata): Females develop a gravid spot (a dark spot near the anus).
- Angelfish (Pterophyllum scalare): Pairs will clean a flat surface (leaf, rock) where they will lay their eggs.
Isolating Breeding Pairs or Groups
Isolating breeding pairs or groups is often necessary to create an environment conducive to spawning and protect eggs and fry from predation. The method of isolation will depend on the species and the breeding strategy.
- Separate Breeding Tanks:
- Setup: A dedicated breeding tank should be set up with appropriate water parameters and furnishings for the species. This tank should be cycled and ready before the fish are introduced.
- Introduction: Introduce the breeding pair or group to the breeding tank after they have been conditioned.
- Observation: Closely monitor the fish for signs of spawning.
- Removal of Parents: After spawning, the parents may need to be removed to protect the eggs or fry from predation. The timing of removal depends on the species. Some species will eat their eggs, while others will protect them.
- Breeding Traps or Containers:
- Use: Breeding traps or containers can be used to isolate the female after spawning, especially in live-bearing species.
- Benefits: These devices help protect the fry from being eaten by the mother.
- Group Breeding:
- Applicability: Some species breed best in groups. In this case, a group of males and females can be introduced to a larger breeding tank.
- Considerations: Ensure there are enough hiding places and cover to reduce aggression.
- Environmental Control:
- Lighting: Adjust the lighting to mimic the natural breeding season of the fish.
- Water Flow: Maintain gentle water flow to simulate natural conditions.
- Temperature: Adjust the water temperature to stimulate spawning.
Breeding Methods and Techniques
Understanding the diverse strategies fish employ for reproduction is crucial for successful breeding in a controlled environment. Different species have evolved unique methods, each with its own set of requirements and considerations for aquarists. This section will delve into these various breeding techniques, providing practical guidance and comparative analyses to aid in your fish breeding endeavors.
Egg-Scattering, Egg-Laying, and Live-Bearing Breeding Methods
Fish reproduction strategies can be broadly categorized into three main types: egg-scattering, egg-laying, and live-bearing. Each method presents distinct challenges and opportunities for the aquarist.
- Egg-Scattering: This method involves the female releasing eggs freely into the water, where the male then fertilizes them. The eggs often lack adhesive properties and sink to the substrate or are dispersed by currents.
- Example: Many characins (e.g., tetras) and some cyprinids (e.g., barbs) are egg-scatterers.
- Considerations: Protecting the eggs from predation by the adults is a primary concern. This often necessitates the use of a bare-bottomed breeding tank or a tank with a layer of marbles or a spawning mop to prevent the adults from consuming the eggs.
- Egg-Laying: In this strategy, eggs are laid in a specific location, such as on plants, rocks, or in nests constructed by the parents. This provides a degree of protection for the eggs.
- Example: Many cichlids, gouramis, and bettas are egg-layers.
- Considerations: The specific substrate or structure required for egg-laying varies depending on the species. Some species exhibit parental care, such as guarding the eggs and fry, which influences tank setup and adult removal timing.
- Live-Bearing: Live-bearing fish give birth to fully formed, free-swimming fry. The eggs develop internally within the female, and the fry are nourished by the mother.
- Example: Guppies, mollies, platies, and swordtails are popular live-bearing fish.
- Considerations: The female fish must be provided with a safe environment to give birth, and the fry must be protected from being eaten by the adults. Breeding traps or heavily planted tanks are often used.
Setting Up a Breeding Tank for Betta splendens
Setting up a breeding tank for Betta splendens (Siamese fighting fish) requires careful planning and execution to ensure successful spawning and fry survival. Here’s a step-by-step guide:
- Tank Selection: Choose a tank that is at least 5 gallons in size. A smaller tank can be used, but a larger tank provides more space and water stability.
- Water Parameters: Maintain the water temperature between 80-86°F (26-30°C). Use a heater and a thermometer to monitor the temperature. Ensure the water is clean and well-filtered, with a pH of around 6.5-7.0. Perform regular partial water changes.
- Tank Setup:
- Substrate: Use a bare bottom or a very thin layer of sand. This simplifies cleaning and helps prevent the build-up of harmful bacteria.
- Decorations: Provide a few floating plants, such as water sprite or duckweed, to give the female a place to hide and the male a place to build his bubble nest.
- Filtration: Use a gentle filter, such as a sponge filter, to avoid disturbing the bubble nest and the delicate fry.
- Conditioning the Fish: Feed the male and female high-quality food, such as live or frozen bloodworms, brine shrimp, and daphnia, to condition them for breeding. Separate the male and female in different tanks for about a week, allowing them to see each other.
- Introducing the Fish: Place the female in the breeding tank. Introduce the male. Observe their behavior closely. The male will build a bubble nest. If the female is receptive, she will approach the nest.
- Spawning: The male will embrace the female, and she will release eggs. The male will collect the eggs and place them in the bubble nest.
- Removing the Female: After spawning is complete, remove the female from the tank. The male will guard the eggs.
- Caring for the Fry: After about 24-48 hours, the eggs will hatch. The fry will remain in the bubble nest for a few days. After the fry become free-swimming, remove the male. Feed the fry infusoria, then move to baby brine shrimp and other small foods.
Comparing Different Breeding Techniques for Various Fish
Different fish species require different breeding strategies. The following table provides a comparative overview of various breeding techniques, highlighting key aspects of each method.
| Species | Breeding Method | Tank Setup Considerations | Parental Care |
|---|---|---|---|
| Betta splendens (Siamese Fighting Fish) | Bubble Nest Builder, Egg Layer | 5+ gallon tank, floating plants, gentle filtration, bare bottom. | Male guards eggs and fry; female removed after spawning. |
| Guppy (Poecilia reticulata) | Livebearer | Heavily planted tank or breeding trap to protect fry. | None. Fry are independent at birth. |
| Discus (Symphysodon aequifasciatus) | Egg Layer, Substrate Spawner | Clean tank, spawning cone or smooth vertical surface. | Both parents guard eggs and fry, feeding them a mucus secretion. |
| Corydoras Catfish | Egg Scatterer, Adhesive Eggs | Bare-bottomed tank, spawning mops or plants. | None. Eggs are left unattended after spawning. |
Procedure for Removing Adult Fish After Spawning
Removing adult fish after spawning is crucial for protecting the eggs or fry from predation. The timing and method of removal depend on the species and their breeding behavior.
- Observe Spawning Behavior: Monitor the spawning process to determine when spawning is complete. Look for signs such as the male ceasing to guard the nest (in bubble nest builders) or the female no longer being near the spawning site.
- Assess Parental Care: Determine if the species exhibits any form of parental care. If the parents guard the eggs or fry, the timing of removal is critical. Remove the female immediately after spawning, but leave the male with the eggs if he is the caregiver.
- Gentle Removal: Use a net to gently scoop the adult fish from the tank. Avoid sudden movements that could stress the fish or damage the eggs.
- Quarantine (Optional): Place the removed fish in a separate, appropriately sized quarantine tank for observation. This helps to monitor for any injuries or diseases.
- Water Quality: Maintain optimal water quality in the breeding tank to promote egg development and fry survival. Perform partial water changes as needed.
Egg and Fry Care

The successful propagation of fish hinges on meticulous care from the egg stage through the vulnerable fry period. This crucial phase demands vigilant monitoring, precise environmental control, and a proactive approach to prevent disease and ensure optimal growth. Understanding and implementing the right strategies during this time significantly increases the chances of a thriving new generation of fish.
Procedures for Egg Care and Hatching
Egg care begins immediately after spawning. The specific methods vary depending on the fish species and the spawning method used (e.g., adhesive eggs, non-adhesive eggs, mouthbrooders).* Handling and Incubation: Eggs must be handled with extreme care. Adhesive eggs are often attached to a substrate within the breeding tank. Non-adhesive eggs are typically collected and incubated separately. Mouthbrooders incubate eggs within their mouths.
The incubation environment should mimic the natural habitat as closely as possible. This includes maintaining the appropriate water temperature, water quality (oxygen levels, pH), and gentle water movement to prevent fungal growth and ensure oxygenation.
Preventing Fungus and Disease
Fungal infections are a significant threat to fish eggs. Preventative measures include maintaining excellent water quality, removing any unfertilized or dead eggs promptly (these are prime targets for fungal growth), and, in some cases, using antifungal treatments like methylene blue or hydrogen peroxide, but always consult with species-specific guidance.
Temperature Control
Temperature plays a crucial role in the incubation period. Different species have specific temperature requirements for optimal egg development and hatching rates. Maintaining the correct temperature accelerates the development process, whereas fluctuations can lead to deformities or mortality. For example, the common goldfish (Carassius auratus) typically incubates at temperatures between 18-24°C (64-75°F), with hatching occurring in approximately 4-7 days.
Hatching Process
As the eggs develop, the embryos become visible. Once the fry are ready to hatch, they break free from the egg membrane. In some species, the fry are still attached to a yolk sac, which provides nourishment for a few days after hatching.
Feeding Requirements of Newly Hatched Fry
Newly hatched fry have unique nutritional needs. Their digestive systems are not fully developed, requiring small, easily digestible food sources. The type of food provided and the feeding frequency are critical for survival and growth.* Initial Feeding: The first food source typically consists of infusoria, which are microscopic organisms that can be cultivated in a separate culture. Infusoria provide essential nutrients for the very young fry.
Transition Foods
As the fry grow, the diet should be transitioned to larger food items. These may include:
- Newly hatched brine shrimp (Artemia): Brine shrimp nauplii are a widely used and readily available food source, providing a good source of protein.
- Microworms: Microworms are a good alternative and easier to culture than some other live foods.
- Finely crushed flake food: High-quality flake food, ground into a fine powder, can be used as a supplement or alternative, but should not be the primary food source for the smallest fry.
Feeding Frequency
Frequent feeding is essential, especially for the first few weeks. Fry should be fed small amounts multiple times a day (e.g., 6-8 times a day) to ensure they have a constant supply of food.
Species-Specific Needs
The specific feeding requirements vary depending on the species. Some species may require specialized diets or supplements. For example, carnivorous species might need a higher protein diet from the beginning, while herbivorous species may require the introduction of algae-based foods earlier.
Common Diseases Affecting Fry and Prevention
Fry are particularly vulnerable to diseases due to their immature immune systems. Maintaining a healthy environment and proactive disease prevention are crucial.* Fungal Infections: Fungal infections, such as Saprolegnia, can quickly spread in fry tanks. Maintaining good water quality and removing any dead or uneaten food is crucial.
Bacterial Infections
Bacterial infections can cause significant mortality. Prevention includes maintaining optimal water parameters, avoiding overcrowding, and quarantining new fish or plants before introducing them to the breeding tank.
Parasitic Infections
Parasites like Ich (white spot disease) can be devastating. Quarantine new fish, observe for signs of infection, and treat promptly if necessary.
Preventative Measures
- Quarantine: Always quarantine new fish before introducing them to the fry tank.
- Water Quality: Maintain excellent water quality with regular water changes.
- Overfeeding: Avoid overfeeding, as uneaten food contributes to poor water quality and disease.
- Observation: Regularly observe the fry for any signs of disease, such as lethargy, fin rot, or unusual behavior.
- Prophylactic Treatments: In some cases, preventative treatments with medications like salt or methylene blue can be used, but always research the species’ tolerance before use.
Water Changes and Water Quality Maintenance for Fry Tanks
Maintaining pristine water quality is paramount for fry survival and growth. Regular water changes are essential, but they must be performed carefully to avoid stressing the delicate fry.* Frequency and Volume: Water changes should be performed frequently, ideally daily or every other day. The volume of the water change depends on the size of the tank and the number of fry, but a general guideline is 10-20% of the tank volume.
Water Preparation
- Temperature Matching: The new water should be the same temperature as the tank water to avoid temperature shock.
- Dechlorination: The new water must be dechlorinated to remove harmful chlorine and chloramine.
- Water Source: Use a reliable water source, preferably tap water that has been treated with a dechlorinator or aged water.
Water Quality Monitoring
Regularly test the water parameters, including ammonia, nitrite, and nitrate levels. High levels of these substances are toxic to fry.
Gentle Water Changes
When performing water changes, use a gentle method to avoid disturbing or harming the fry. A small siphon with a fine mesh guard can be used to remove water.
Maintaining Water Quality
- Filtration: Use a gentle filtration system, such as a sponge filter, to provide mechanical and biological filtration. Avoid filters with strong currents that could harm the fry.
- Aeration: Ensure adequate aeration to provide sufficient oxygen levels.
- Substrate: Avoid using substrate in fry tanks, as it can trap uneaten food and waste, leading to poor water quality.
Feeding and Nutrition

Proper nutrition is paramount for successful fish breeding. The quality and type of food directly impact the health, fertility, and overall breeding success of your fish. A well-balanced diet ensures that breeding stock are in prime condition, produce viable eggs, and that the fry develop into healthy, robust juveniles. Careful attention to feeding is a fundamental aspect of fish breeding management.
Feeding Adult Breeding Fish
Adult breeding fish require a diet that provides a balance of protein, carbohydrates, fats, vitamins, and minerals. This diet should support their energy needs, reproductive processes, and overall health.
- High-Quality Flake Food: Choose flake foods specifically formulated for breeding fish or those with high protein content (around 40-50%). Look for ingredients like fish meal, krill, and spirulina.
- Pellet Food: Pellets offer a more concentrated nutritional source. Select pellets designed for the specific species, considering size and protein content.
- Live Foods: Live foods are an excellent source of protein, essential amino acids, and vitamins. Examples include:
- Brine Shrimp (Artemia): Easily cultured and highly nutritious.
- Daphnia: A good source of protein and readily consumed.
- Bloodworms (Chironomus larvae): A favorite of many fish species, providing a boost of nutrients.
- Tubifex Worms: Rich in protein, but require careful cleaning to prevent disease.
- Frozen Foods: Frozen foods offer a convenient and nutritious alternative to live foods. They retain most of their nutritional value and are readily available. Examples include:
- Frozen Brine Shrimp: A convenient alternative to live brine shrimp.
- Frozen Bloodworms: A readily available option.
- Frozen Daphnia: Easy to store and feed.
- Mysis Shrimp: A good source of protein and essential fatty acids.
- Vegetable Matter: Some fish species benefit from the addition of vegetable matter to their diet. This can include blanched spinach, zucchini, or algae wafers.
Feeding Fry: A Stage-by-Stage Guide
Fry have specific nutritional requirements that change as they grow. Providing the correct food at each stage is crucial for their survival and development. The size of the food particles must also be appropriate for the size of the fry’s mouths.
- Newly Hatched Fry (0-7 days): Fry at this stage require very small food particles.
- Infusoria: The first food source, providing tiny organisms like paramecium. This can be cultured.
- Liquid Fry Food: Commercially available liquid foods are formulated to meet the nutritional needs of newly hatched fry.
- Egg Yolk: A small amount of boiled egg yolk, finely ground, can be used, but requires careful monitoring to avoid water quality issues.
- Fry (7-14 days): As fry grow, they need larger food particles.
- Microworms: A readily available live food source that is small enough for the fry to consume.
- Vinegar Eels: Another live food option, smaller than microworms.
- Finely Ground Flake Food: Flake food ground into a fine powder.
- Juvenile Fry (14 days onwards): Juvenile fry can consume larger foods.
- Baby Brine Shrimp (Artemia nauplii): A highly nutritious food source.
- Finely Ground Flake Food and/or Pellets: Start transitioning to commercial foods.
- Small Daphnia: Gradually introduce small daphnia.
The Importance of a Varied Diet
A varied diet is essential for optimal breeding results. A diet consisting of only one type of food, even if nutritionally complete, may lack certain essential nutrients or lead to nutritional deficiencies.
- Improved Health and Immunity: A varied diet provides a wider range of vitamins and minerals, strengthening the immune system and making fish more resistant to diseases.
- Enhanced Reproduction: A diverse diet supports reproductive processes, leading to higher egg production, improved egg viability, and healthier fry.
- Balanced Nutrient Intake: Different foods have different nutritional profiles. A varied diet ensures that fish receive a balanced intake of proteins, carbohydrates, fats, vitamins, and minerals.
- Reduced Risk of Nutritional Deficiencies: By feeding a variety of foods, you minimize the risk of your fish developing nutritional deficiencies.
Nutritional Value Comparison of Fish Foods
The nutritional content of fish foods varies considerably. Understanding the nutritional profiles of different food types is essential for making informed feeding choices.
| Food Type | Protein Content (%) | Fat Content (%) | Fiber Content (%) | Key Benefits |
|---|---|---|---|---|
| High-Quality Flake Food | 40-50 | 8-12 | 3-5 | Balanced nutrition, easy to feed |
| Pellet Food (Breeding Formula) | 45-55 | 10-15 | 2-4 | Concentrated nutrition, good for growth |
| Frozen Brine Shrimp | 5-7 | 1-2 | 0 | High in protein and essential fatty acids |
| Live Bloodworms | 5-10 | 1-3 | 0 | Appealing taste, good for conditioning |
Disease Prevention and Treatment
Maintaining a healthy breeding environment is crucial for the well-being of your fish and the success of your breeding program. Disease outbreaks can quickly decimate a breeding population, leading to significant losses. Proactive disease prevention, coupled with swift and accurate treatment, is therefore paramount. This section will delve into recognizing and managing common fish diseases, ensuring the health and longevity of your fish.
Recognizing Common Fish Diseases and Their Symptoms
Early detection is critical in managing fish diseases. Familiarizing yourself with the common ailments and their associated symptoms allows for prompt intervention, significantly increasing the chances of successful treatment and minimizing the spread of infection. Observing your fish regularly is essential for identifying any deviations from their normal behavior and appearance.
- Ich (Ichthyophthirius multifiliis): This parasitic infection is characterized by small, white spots (about 0.5 to 1 mm in diameter) resembling grains of salt on the fish’s body, fins, and gills. Affected fish may exhibit flashing (rubbing against objects), lethargy, and difficulty breathing. The parasite thrives in temperatures above 20°C (68°F).
- Fin Rot: Bacterial infections often cause fin rot. The fins appear frayed, ragged, and may progressively deteriorate. In severe cases, the fins can completely erode. The fish may also exhibit lethargy and loss of appetite. Poor water quality is a primary contributing factor.
- Fungal Infections (Saprolegnia): These infections typically appear as cotton-like growths on the fish’s body, fins, or gills. They often develop on pre-existing wounds or areas damaged by other infections. The fungus thrives in poor water conditions.
- Dropsy: Dropsy is not a disease itself, but rather a symptom of an underlying condition, often bacterial. It’s characterized by the swelling of the abdomen due to fluid accumulation, causing the scales to protrude, giving the fish a “pinecone” appearance. The fish may also exhibit lethargy and loss of appetite.
- Columnaris (Cotton Wool Disease): This bacterial infection manifests as white or grey patches on the body, fins, and mouth, often resembling cotton wool. It can rapidly progress, leading to fin rot and gill damage. Poor water quality and stress are major contributing factors.
- Swim Bladder Disease: This condition affects the fish’s ability to control its buoyancy. Fish may swim erratically, struggle to maintain their position in the water, or float at the surface or sink to the bottom. The causes can vary, including bacterial infections, parasites, or physical damage.
Methods for Quarantining New Fish to Prevent Disease Outbreaks
Quarantining new fish is a crucial preventative measure that can significantly reduce the risk of introducing diseases into your established breeding tanks. This process involves isolating new arrivals for a specific period, observing them for signs of illness, and treating them if necessary, before introducing them to the main breeding tanks.
- Setting Up a Quarantine Tank: A separate tank, preferably with its own filtration system, should be dedicated solely to quarantine purposes. This tank should be of a suitable size for the fish you intend to quarantine. Use a bare-bottom tank (without substrate) for easy observation and cleaning.
- Water Parameters: Maintain optimal water parameters in the quarantine tank, including appropriate temperature, pH, and ammonia, nitrite, and nitrate levels. Regular water changes are essential to maintain water quality.
- Observation Period: Quarantine new fish for a minimum of 2-4 weeks. During this time, observe them closely for any signs of disease, such as those mentioned above.
- Treatment (Prophylactic): Prophylactic (preventative) treatment can be considered, even if no symptoms are observed. This may involve treating the fish with a broad-spectrum medication, such as a medication containing methylene blue or a mild antibacterial agent, to eliminate any potential pathogens. Follow the manufacturer’s instructions carefully.
- Treatment (If Necessary): If any signs of disease are observed during the quarantine period, treat the fish with the appropriate medication based on the specific diagnosis. Isolate the affected fish from the others in the quarantine tank if necessary.
- Gradual Introduction: After the quarantine period and with no signs of illness, gradually acclimate the quarantined fish to the water parameters of the main breeding tank before introduction.
Effective Treatments for Common Fish Diseases, Specifying Medication and Dosages
Treating fish diseases requires accurate diagnosis and the appropriate medication. The effectiveness of treatment depends on the specific disease, the severity of the infection, and the timely application of the correct medication. Always consult with a veterinarian specializing in aquatic animals for a definitive diagnosis and treatment plan, especially in cases of severe or persistent illness. The following information is for informational purposes only.
- Ich: Treat with medications containing malachite green and formalin, following the manufacturer’s instructions carefully. Increase the water temperature gradually to 86°F (30°C) to accelerate the parasite’s life cycle, making it more susceptible to treatment. Water changes are essential to maintain water quality and remove dead parasites. A common dosage is 1-2 drops per gallon, but always follow the product instructions.
- Fin Rot: Treat with antibacterial medications, such as those containing erythromycin or tetracycline. Perform water changes regularly to improve water quality. Follow the manufacturer’s instructions for dosage.
- Fungal Infections: Treat with antifungal medications containing malachite green or methylene blue. You can also use medications containing copper sulfate. Follow the manufacturer’s instructions for dosage.
- Dropsy: Treatment is often challenging and depends on the underlying cause. Antibiotics, such as kanamycin or tetracycline, may be used if the dropsy is caused by a bacterial infection. Epsom salt baths (1 tablespoon per 5 gallons) can help reduce fluid retention. Consult a veterinarian for a definitive diagnosis and treatment plan.
- Columnaris: Treat with antibacterial medications, such as those containing kanamycin or oxytetracycline. Improve water quality through frequent water changes. Follow the manufacturer’s instructions for dosage.
- Swim Bladder Disease: Treatment varies depending on the cause. Antibiotics may be used if a bacterial infection is suspected. Adjust water parameters and diet as needed. Fasting the fish for a few days can sometimes help. Consult a veterinarian.
Important Note: Always remove activated carbon from your filter when medicating, as it will absorb the medication. Replace the carbon after the treatment is complete. Always research the specific medication you intend to use, including its compatibility with your fish species and any potential side effects. Overdosing or improper use of medications can be harmful to your fish.
The Importance of a Clean Tank Environment in Disease Prevention
A clean and well-maintained tank environment is the cornerstone of disease prevention in fish breeding. Poor water quality, characterized by high levels of ammonia, nitrite, and nitrate, creates a stressful environment for fish, weakening their immune systems and making them more susceptible to disease.
- Regular Water Changes: Perform regular partial water changes (25-50% weekly) to remove accumulated waste, excess nutrients, and harmful chemicals.
- Effective Filtration: Use a filtration system appropriate for the size of your tank and the number of fish. The filter should provide mechanical, biological, and chemical filtration.
- Proper Substrate Management: If using substrate, vacuum it regularly to remove debris and uneaten food. Avoid overfeeding to minimize waste.
- Avoid Overcrowding: Overcrowding increases stress and leads to poor water quality. Ensure that your tank is not overstocked.
- Quarantine New Fish: As previously discussed, quarantining new fish is crucial to prevent the introduction of diseases.
- Balanced Diet: Feed your fish a high-quality, balanced diet appropriate for their species. Avoid overfeeding.
- Remove Dead Fish and Debris: Remove dead fish and any uneaten food promptly to prevent the build-up of harmful bacteria and toxins.
- Monitor Water Parameters: Regularly test your water parameters (ammonia, nitrite, nitrate, pH, and temperature) using a reliable test kit. Make adjustments as needed to maintain optimal water quality.
Tank Maintenance and Cleaning
Maintaining a clean and stable environment is crucial for successful fish breeding. Regular tank maintenance not only supports the health of the breeding fish but also significantly improves the survival rates of eggs and fry. Neglecting these practices can lead to poor water quality, disease outbreaks, and ultimately, breeding failures. This section will detail the essential steps involved in keeping your breeding tanks pristine.
Methods for Cleaning Tank and Equipment
Cleaning breeding tanks and their equipment requires a delicate balance to avoid disrupting the breeding process. The goal is to remove waste and debris without stressing the fish or harming any eggs or fry present.
- Gentle Vacuuming: Use a gravel vacuum to carefully remove detritus from the substrate. Avoid disturbing the substrate too vigorously, as this can release trapped waste and potentially harm eggs or fry. Work slowly and deliberately, targeting areas with visible waste accumulation.
- Surface Skimming: Use a surface skimmer to remove oily films and debris from the water’s surface. This improves gas exchange and light penetration. Regular skimming prevents the build-up of these films, which can impede oxygen absorption.
- Equipment Cleaning: Clean filters, heaters, and air stones separately. Rinse filter media in used tank water (never tap water) to preserve beneficial bacteria. Wipe down heaters and air stones with a soft cloth to remove algae and debris.
- Algae Removal: Use an algae scraper or magnetic cleaner to remove algae from the tank glass. Be careful not to scratch the glass or disturb the fish. Regular algae removal maintains good visibility and aesthetics.
- Water Changes: Perform regular partial water changes, as detailed below, to remove dissolved waste products and replenish essential minerals.
Water Change Frequency and Dechlorination Importance
Regular water changes are fundamental to maintaining optimal water quality in breeding tanks. The frequency and volume of water changes depend on factors such as tank size, stocking density, and the presence of fry.
- Frequency: Typically, perform 10-25% water changes once or twice a week. For tanks with fry, more frequent and smaller water changes (e.g., 5-10% daily or every other day) may be beneficial. Observe the water parameters and the behavior of the fish to determine the optimal frequency.
- Dechlorination: Always dechlorinate tap water before adding it to the tank. Chlorine and chloramine are toxic to fish. Use a water conditioner that removes chlorine, chloramine, and heavy metals.
- Temperature Matching: Ensure the new water is the same temperature as the tank water to avoid shocking the fish. Use a thermometer to monitor the water temperature.
- Water Preparation: Prepare the new water in a separate container and add the dechlorinator according to the product instructions. Allow the water to sit for a few minutes before adding it to the tank.
- Water Addition: Add the new water slowly to the tank, either directly or using a siphon. Avoid pouring the water directly onto the fish or substrate.
Step-by-Step Guide to Cleaning Filters
Filters are essential for maintaining water quality by removing particulate matter and converting harmful waste products. Cleaning filters is a critical maintenance task.
- Preparation: Unplug and remove the filter from the tank. Place it in a container with used tank water.
- Media Removal: Carefully remove the filter media. The types of media commonly found in filters include:
- Mechanical Media: Sponge, filter floss, or filter pads. These remove particulate matter.
- Biological Media: Ceramic rings, bio-balls, or porous rocks. These provide a surface for beneficial bacteria to colonize.
- Chemical Media: Activated carbon, which removes dissolved organic compounds, medications, and odors.
- Rinsing Media: Gently rinse the mechanical media in used tank water to remove debris. Avoid rinsing the biological media too vigorously, as this can damage the beneficial bacteria. Replace chemical media as needed, typically every 2-4 weeks.
- Filter Housing Cleaning: Clean the filter housing with used tank water. Remove any accumulated debris.
- Reassembly: Reassemble the filter, placing the media back in the correct order (typically mechanical media first, followed by biological media).
- Re-Installation: Reinstall the filter in the tank and plug it back in.
Process of Removing Algae Growth
Algae growth can detract from the aesthetics of a breeding tank and, in excessive amounts, can also negatively affect water quality. Controlling algae requires a multi-faceted approach.
- Glass Cleaning: Use an algae scraper or magnetic cleaner to remove algae from the tank glass. Scrape the glass gently to avoid scratching it. The frequency of cleaning depends on the rate of algae growth, but typically, cleaning is required every few days to a week.
- Component Cleaning: Remove and clean any decorations, equipment, or surfaces that have algae growth. Rinse these items in used tank water.
- Lighting Control: Reduce the duration and intensity of lighting to limit algae growth. Too much light can fuel algae blooms. Consider using a timer to control the lighting cycle.
- Nutrient Control: Excessive nutrients, particularly nitrates and phosphates, can contribute to algae growth. Regular water changes and proper feeding practices can help to control nutrient levels.
- Algae Eaters: Introduce algae-eating fish or invertebrates, such as snails or certain types of plecos, to help control algae growth. However, be mindful of their compatibility with the breeding fish and fry.
Troubleshooting Common Issues
Managing fish breeding tanks requires diligent observation and proactive problem-solving. Even with meticulous planning, issues can arise that impact the health of the fish and the success of breeding efforts. This section focuses on identifying and addressing common problems, providing practical solutions to maintain a thriving breeding environment.
Identifying Common Problems
Several issues can plague fish breeding tanks, often stemming from imbalances in the environment or the health of the breeding stock. Recognizing these problems early is crucial for preventing significant losses.
- Poor Water Quality: This is a primary cause of stress and disease. Indicators include cloudy water, elevated ammonia or nitrite levels, and low dissolved oxygen.
- Disease Outbreaks: Bacterial, fungal, or parasitic infections can rapidly spread in a breeding tank. Symptoms include lethargy, fin rot, unusual swimming behavior, and external lesions.
- Infertile Eggs: This can be caused by several factors, including improper conditioning of the breeding stock, incorrect water parameters, or genetic factors.
- Fry Mortality: High fry mortality rates can result from poor water quality, inadequate feeding, or predation by other tank inhabitants.
- Aggression: Overcrowding or mismatched pairings can lead to aggression, injuring or killing fish and disrupting breeding attempts.
Solutions for Common Breeding Problems
Addressing problems promptly and effectively is essential for successful breeding. The following solutions provide guidance for common issues.
- Poor Water Quality: Regular water changes (25-50% weekly), appropriate filtration (mechanical, biological, and chemical), and avoiding overfeeding are crucial. Monitoring water parameters with a test kit is vital.
- Disease Outbreaks: Quarantine new fish before introducing them to the breeding tank. Treat infected fish promptly with appropriate medications (e.g., antibiotics for bacterial infections, antifungals for fungal infections, and antiparasitics for parasitic infections). Improve water quality to support the fish’s immune system.
- Infertile Eggs: Ensure proper conditioning of the breeding stock through a nutritious diet and appropriate environmental conditions. Verify that water parameters are within the species’ preferred range, and consider introducing fresh, clean water.
- Fry Mortality: Maintain excellent water quality, feed fry small, frequent meals of appropriate foods (e.g., infusoria, microworms, or commercially available fry food), and remove any potential predators.
- Aggression: Provide ample hiding places and consider separating aggressive individuals. Ensure the tank is appropriately sized for the fish species and population. Sometimes, rearranging the tank’s decor can reduce aggression.
Importance of Observing Fish Behavior
Observing fish behavior is a critical aspect of successful fish breeding. Subtle changes in behavior can often be early indicators of problems, allowing for timely intervention.
- Changes in Appetite: A sudden decrease or complete loss of appetite can signal illness or stress.
- Lethargy: Fish that are usually active but become listless may be suffering from a disease or poor water quality.
- Unusual Swimming Patterns: Erratic swimming, such as darting, flashing against objects, or staying near the surface or bottom, can indicate a problem.
- Physical Symptoms: Observing the fish for any physical changes such as fin rot, ulcers, or swollen abdomens can help diagnose the problem.
Troubleshooting Flowchart for Breeding Problems
This flowchart Artikels a step-by-step approach to troubleshooting common breeding problems.
| Symptom/Problem | Possible Causes | Troubleshooting Steps | Solution |
|---|---|---|---|
| Cloudy Water | Bacterial bloom, overfeeding, insufficient filtration | Test water parameters (ammonia, nitrite, nitrate). Check filter performance. Observe fish behavior. | Perform water changes (25-50%). Improve filtration. Reduce feeding. Add beneficial bacteria supplement. |
| Lethargy/Loss of Appetite | Disease, poor water quality, stress | Test water parameters. Observe for physical symptoms. Quarantine affected fish. | Treat with appropriate medication. Perform water changes. Improve water quality. Reduce stress factors. |
| Infertile Eggs | Poor conditioning, incorrect water parameters, genetic factors | Review breeding stock conditioning. Test water parameters. Observe breeding behavior. | Improve diet. Adjust water parameters. Consider using a different breeding pair. |
| High Fry Mortality | Poor water quality, inadequate feeding, predation | Test water parameters. Review feeding regime. Observe fry for physical symptoms. | Perform frequent water changes. Provide appropriate fry food. Remove potential predators. |
Documentation and Record Keeping
Meticulous record-keeping is crucial for successful fish breeding. It transforms breeding from a haphazard process into a scientifically manageable one, enabling breeders to understand, replicate, and improve their techniques. Accurate documentation allows for the tracking of progress, identification of successful strategies, and the avoidance of repeated mistakes. Consistent recording provides valuable insights into the factors influencing breeding outcomes, such as water parameters, environmental conditions, and genetic lineage.
Benefits of Documenting Breeding Progress
Documenting breeding progress offers several advantages, contributing significantly to the overall success and efficiency of a breeding program. These benefits extend beyond simply tracking activities and provide a deeper understanding of the process.
- Tracking Performance: Recording breeding attempts and their outcomes provides a clear picture of success rates. This allows breeders to identify successful pairings, techniques, and environmental conditions.
- Identifying Trends: Analyzing historical data helps in recognizing patterns and trends. For instance, changes in water parameters might correlate with spawning success, allowing for adjustments to optimize conditions.
- Troubleshooting Problems: When issues arise, documented records provide a valuable reference point. By reviewing past attempts and conditions, breeders can pinpoint potential causes and implement corrective measures.
- Genetic Management: Keeping track of lineage is vital for maintaining healthy and diverse gene pools. This information prevents inbreeding and allows for the selective breeding of desirable traits.
- Improving Techniques: The documentation serves as a feedback loop. Breeders can analyze the data to refine their methods, making informed decisions about future breeding attempts.
- Sharing Information: Well-documented records can be shared with other breeders, contributing to a collaborative learning environment and advancing the knowledge of fish breeding.
Template for Recording Breeding Activities
A standardized template ensures consistency and facilitates easy analysis of data. The template should include essential details about each breeding attempt, allowing for comprehensive tracking and evaluation. This structure can be adapted to suit specific fish species and breeding setups.
Breeding Attempt Log
| Date | Species | Pairing (Male/Female) | Tank Setup | Water Parameters | Conditioning | Spawning Behavior | Egg Count/Quality | Fry Emergence Date | Fry Survival Rate | Notes/Observations |
|---|---|---|---|---|---|---|---|---|---|---|
| YYYY-MM-DD | (e.g., Betta splendens) | (e.g., Male A / Female B) | (e.g., 10-gallon, bare bottom) | (pH, Temperature, GH, KH, Ammonia, Nitrite, Nitrate) | (e.g., Live food, water changes) | (e.g., Bubble nest, egg laying) | (e.g., 100 eggs, good quality) | YYYY-MM-DD | (e.g., 80%) | (e.g., Feeding schedule, health issues) |
Detailed Explanation of Template Fields:
- Date: The date of the breeding attempt.
- Species: The scientific or common name of the fish species.
- Pairing: Identify the specific male and female individuals involved. This is critical for tracking lineage.
- Tank Setup: Describe the tank, including size, substrate, decorations, and filtration.
- Water Parameters: Record key parameters like pH, temperature, general hardness (GH), carbonate hardness (KH), ammonia, nitrite, and nitrate levels.
- Conditioning: Detail the preparation phase, including diet, water changes, and any other treatments.
- Spawning Behavior: Document observations during the spawning process, such as courtship rituals, egg-laying behavior, and any unusual occurrences.
- Egg Count/Quality: Estimate the number of eggs and assess their quality (e.g., fertile, infertile, fungal growth).
- Fry Emergence Date: Record the date when the fry hatch from the eggs.
- Fry Survival Rate: Track the percentage of fry that survive to a certain age (e.g., one week, one month).
- Notes/Observations: Include any additional observations, such as feeding schedules, health issues, or unusual behaviors.
Importance of Keeping Records of Fish Lineage and Offspring
Maintaining detailed records of fish lineage is paramount for preserving genetic diversity and preventing inbreeding. This practice ensures the long-term health and viability of a breeding program.
- Preventing Inbreeding: Tracking parentage prevents closely related individuals from breeding, which can lead to genetic defects and reduced vitality in offspring.
- Maintaining Genetic Diversity: Careful record-keeping allows breeders to select individuals from different genetic lines, promoting a diverse gene pool and increasing the resilience of the population.
- Tracking Desirable Traits: Lineage records enable breeders to identify and selectively breed fish with specific desirable traits, such as color, finnage, or disease resistance.
- Understanding Inheritance: By tracking offspring characteristics and their parents, breeders can gain insights into the inheritance of specific traits.
- Establishing Breeding Lines: Records of lineage facilitate the establishment of stable breeding lines with consistent characteristics.
- Selling and Sharing Fish: Providing accurate lineage information enhances the value of fish and builds trust with buyers or other breeders.
Information to Be Included in a Breeding Journal or Spreadsheet
Organizing the information in a breeding journal or spreadsheet is crucial for effective data management and analysis. This structure ensures easy access to information and facilitates the identification of trends and patterns.
Breeding Journal/Spreadsheet Organization:
- Header Information: Include the species, date of the attempt, and a unique identification number for the breeding attempt.
- Parental Information: Record the parent fish’s lineage, including their parents, grandparents, and any known genetic traits.
- Tank Setup Details: Document the tank size, substrate, filtration, and any decorations used.
- Water Parameter Records: Include regular measurements of pH, temperature, GH, KH, ammonia, nitrite, and nitrate levels. Record the dates and times of water changes.
- Conditioning Details: Describe the diet and any pre-spawning treatments, such as water changes or temperature adjustments.
- Spawning Observation Notes: Document the spawning behavior, including courtship rituals, egg-laying, and any unusual occurrences. Include the approximate number of eggs and their quality.
- Fry Care Records: Note the date of hatching, feeding schedules, and any health issues. Track the growth rate and survival rate of the fry.
- Offspring Information: Record the sex of the offspring, any observed traits, and their lineage. Consider using photographs or videos to document physical characteristics.
- Photographs/Videos: Include visual documentation of the breeding process, the parent fish, and the offspring. This provides a visual record of the breeding program.
- Analysis and Summary: At the end of each breeding attempt, summarize the results, identify any challenges, and suggest improvements for future attempts.
Final Conclusion
In conclusion, mastering how to manage fish breeding tanks requires dedication and attention to detail, but the rewards are immeasurable. By implementing the principles Artikeld in this guide, you’ll be well-equipped to create a thriving aquatic ecosystem and witness the miracle of life unfold before your eyes. Remember, consistency, observation, and a genuine love for your fish are the keys to a fulfilling and successful breeding journey.